Tuesday 30 July 2013

Tree Pose

Yes, I admit it, I happen to be one of those annoying people who can stand in the yogic 'Tree Pose' endlessly. Sometimes I even find it relaxing to stand around on one leg. No, I am not extremely fit, so it must be some center of gravity thing. Keeping a fondant tree standing on a cake however is not relaxing at all. Just the thought makes me break into cold sweat! Nevertheless, I have committed to producing a standing tree on a cake for N's friend's birthday. It is standing tall and firm on the styrofoam block but whether or not it will stand on a soft cake remains to be seen.

I have seen a tree tutorial on the net before, Joylicious cakes has one I think. it involved wires and I have always been one of those people who cannot bear the thought of having wires sticking into cake. I mean for god's sake stop sticking wires with balloons and stars into cake. it's disgusting! I even stopped watching cake shows on television which suggest you put in styrofoam balls, wires, even pieces of wood in your cake. How is that even a cake anymore? Why don't they just make a sculpture out of mud and take a bunch of cupcakes along and say "here this is for show, and this is to eat"!

having said that, I realised all too soon that a tree without wires was going to be too heavy for a cake. I tried Rice Crispies smooshed together with melted marshmallows (too heavy) and a cookie cut into a tree shape (too fragile) and then I decided to go with the wires, with one small exception. The wires will not touch my cake(Thank you Joylicious!). So the tree won't be edible even though it will be covered in edible stuff, but the cake will be.

I have used some specialised cake equipment to make this tree but they are by no means necessary. So here is what you need:


You can get Tylose powder and the 'food safe' wire at CCDS if you are in India. If you don't have leaf cutters you can use a paper template, though that is much more tedious. And if you don't have the silicone veiner you can just score lines on the leaf with the end of a toothpick. You also need floral tape or masking tape 

Colour your gum paste (fondant mixed with tylose powder) green. The shade doesn't matter. Roll it out as thin as you can. Remember to either use a non stick surface or lots of icing sugar to prevent it from sticking. Now use your cutter or your template to cut out leaves. How many leaves you need will depend on the size of your tree and how full you want it to be.

cut the wire with a wire cutter into 4 inch lengths. You need as many pieces as there are leaves.


Gently push the wire into place where the stem of the leaf would be. I find that if you gently rotate the wire while putting it in, it is easier.

Next, you use your veiner to create the leafy texture or if you don't have a veiner, just score leaf like lines with a toothpick.


If you are using a veiner, please remember to brush each side nicely with cornflour otherwise you'll just have a sticky goopy mess which will be hard to take out from the mould. I didn't put the cornflour for this photograph. So the leaf you see here didn't make it.


adding veins to the leaves just makes them look more realistic.


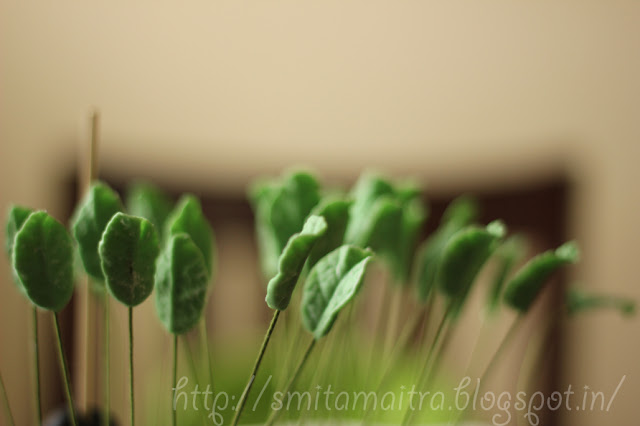
After all the leaves are made stick the free ends of the wires into a styrofoam block and let the leaves dry overnight.


Ah..so pretty! I would have done O'Henry proud methinks if I had been the one painting that last leaf on the tree. 

Once they are dry you can shade them with a little green or brown food colour diluted with lemon juice.

Now take 3-4 really long wooden barbecue skewers that are safe to go into cake, We put them into food all the time after all. Push the skewers about two inches deep into a styrofoam block. Now use masking tape or floral tape which is available at CCDS to bind the part of the skewers that are sticking out, together.

take some long pieces of wire (I am told they are food safe but will still not put them in the cake) and wrap them around the skewers forming branches. Take a look at the photograph below to get an idea of how the tree structure should look.


This is the fun part. wrap the wire stems of the leaves around the branches you have just created. Don't rush this step because the leaves are extremely fragile.


After you are satisfied with how your branches look with the leaves on them, take some brown coloured fondant and gently and carefully wrap in bits and pieces around each branch, making sure all the wire is covered. Leave to dry overnight.

Take a small cake board and make a hole in the center. Remove the tree from the styrofoam block and push the exposed part of the skewers through the hole. 

So now when you put the tree on the real cake, the wooden skewers will go inside the cake and there will be a cake board between the wires and the cake. 


I will be covering the cake board with green fondant so that it blends in with the cake. You have to wait for another post to see it all come together on a cake.

Note: 7th August 2013

The tree stood!


Wednesday 24 July 2013

One Fine Day


Have you ever noticed how in American movies the successful female professional walks down the avenue with a paper cup of coffee in one hand and a cellphone to her ear giving directions of utmost importance to some unknown person, presumably a secretary or a junior at work? The woman usually is in sharp focus, her hair bobs up and down, and she is the only one in the crowd of Hollywood corporates behind her who is wearing a brightly coloured suit. Everyone else hazy in the background wears black.

That woman of the movies is my secret idol – the person I have always wanted to be. Not to do the work she does, but to walk down the road with a coffee in my hand while talking business on the phone. In my dream her exact work has no specifics, it is simply something important. It is important and it is all-consuming. There is no time to stop for a coffee – it must be on the go. It’s an exciting roller coaster of a life, where there is something unknown being achieved. The end is of no importance. All that matters is the process of being glamourously busy and exhilaratingly stressed.

The closest I came to being that busy corporate woman of my dreams was when I started reporting on business and economy. But instead of the busy streets of Manhattan, on most days I found myself walking down the paan spit stained corridors of Shastri Bhawan (a government office). I was not talking to my secretary on the phone, instead I was speaking to some press officer of some minister, with the obligatory towel at the back of his chair. Despite all that, sometimes I wish I could get up in the morning and just leave for work. Let's face it, you get to drink more coffee at work and you get to go to the loo whenever you want! Here is a snapshot of my faux 'businessy' look of yore. 


I once went to London on work. We had a free day in between and I decided, what the heck, nobody knows me here. So, I bought a cup of coffee and stomped down the road with a look of intense purpose. I sipped my coffee and spoke to someone on the phone, all the while looking extremely busy. And then I walked into this building. Did I mention that I was walking down the very touristy Regent Street and the building I entered was Hamleys, the toy store? They could have made a movie about me, I looked like this busy working mother (think Michelle Pfeiffer in One Fine Day) who made sure she had time to pick up that all important birthday gift for her baby.

Today's recipe is for a real life Michelle-Pfeiffer-One-Fine-Day type character who is super busy but still wants to bake something to munch on, because, it is super easy and quick.


Chocolate and Nut Bars (adapted from Joy of Baking)

113 grams butter, at room temperature
105 grams firmly packed light brown sugar
3/4 teaspoon pure vanilla extract
130 grams all purpose flour
1/4 teaspoon salt
Topping:
180 grams semi sweet chocolate, chopped)
1/2 cup finely chopped toasted almonds or toasted hazelnuts

Method:
Preheat oven to 180 degrees C 
Line the bottom and sides of an 8 inch square baking pan with aluminum foil.
In a bowl whisk the flour with the salt.
With a hand mixer, beat the butter and sugar until light and fluffy
Beat in the vanilla extract. Scrape down the sides of the bowl and then add the flour mixture, mixing only until smooth.
Spread the shortbread evenly on the bottom of the prepared pan and bake for about 20 minutes or until the shortbread is golden brown.
Remove from oven and immediately scatter the chocolate chips over the hot shortbread. Return the shortbread to the oven for a minute or just until the chocolate softens. Remove from oven and spread the chocolate evenly with the back of a spoon.
Sprinkle the chopped nuts over the chocolate. Place the pan on a wire rack to cool completely.
Once the chocolate has set, lift the shortbread from the pan using the edges of the foil. Place on a cutting board and, with a sharp knife, cut into 16 squares.

It might not be gourmet, but it hits the right spot especially late at night when you raid your fridge, Nigella style.


Tuesday 23 July 2013

A Labour of Love

I know I must come across as a very good wifely wife and a good 'mom' (Oh how I detest that word) Please call me 'mother' if you must? even 'mum' will do, my children call me 'mamma'. Anyway so you probably have this vision of a sunshiny person. You think I wake up smiling in the morning with a skip in my step and I smile a gleaming toothpaste commercial smile at everyone. And then I serve breakfast to the family with a glow on my face. Different things for everyone, whatever they want! I never scold the children, I bake them goodies every day, I don't have even the hint of a frown line on my forehead and then I wave them goodbye with my hair bobbing up and down in slow motion. The kids go to school and the husband with his briefcase goes off to work and then I sit down and read a magazine and bake. 

Well I am not that person. For one my husband does not carry a briefcase to work. Does anyone carry a briefcase to work? secondly, I don't know how to cook. I have never known how to and I couldn't be bothered to try. So yes, I can make tea or coffee or salad at the most, but producing a meal for the family is beyond my capabilities...unless of course cake counts as food. My husband does all the cooking in the house, Or as is the case now, he tells the cook what to make and gives an exact recipe. When I say he cooks, I don't mean he knows how to cook. I mean he cooks better than most people I know. He can make anything from butter chicken and kababs to plated degustation style European food, complete with little sauce dots on the plate. If we eat something outstanding at a restaurant, he can replicate and in fact better it at home.

I think maybe he believes in that old saying about the way to the heart being through the stomach, well good for him because my heart is IN my stomach. He made the most outstanding Vietnamese chicken salad the other night and I thought I must share the recipe. This isn't just a baking blog. It says so right on top


Ingredients

Salad:
1 small head of chinese cabbage shredded
1 carrot julienned 
1 green mango julienned
2 handfuls of bean sprouts
2 red onions finely sliced
2 pan roasted boneless chicken breasts thinly sliced
2 tablespoons roasted sesame seeds
handful of chopped coriander 
handful of chopped mint

Dressing:
1 small knob of ginger
6-7 garlic cloves
2 tablespoons of brown sugar
100 ml fish sauce
100 ml water
2 fresh thai red chillies
juice of 2-3 limes

Method:

Toss all the shredded vegetables, sprouts and sliced chicken together. 
Add most of the dressing and toss again.
Serve and sprinkle toasted sesame seeds on top


Of course those were not the portion sizes, when we were polishing it off.

On his birthday a food surprise is always a good surprise. He doesn't like anything that can be bought in the market. And the only food I know is cake. Here is what I made. It is a golden cake frosted with Bavarian Cream flavoured Swiss Meringue Buttercream, layered with mixed berry compote and then covered in fondant.


And how do you keep something like this a surprise when you live with the person? It was painstaking to say the least. I would make all the little gum paste details in the morning after he left. Then they would dry on the table and I would pick them all up and put them into a box and hide the box in the cupboard before he got back. Again the next morning, I would take them all out to let them dry.

Lazy that I am, I also invited N’s friends over to help me make the little vegetables. That was a play date that got me lots of brownie points from the kids and the mothers.

It was an extremely enjoyable cake to make, to think of all the different elements I could put on the kitchen counter and see it all come together in the end. The muffin pan on the counter is a little bit of me in the kitchen.


It is no secret that given half a chance, he would leave his current job and be a chef, but unfortunately for him, nobody is giving him that chance. Well he gets to wear a chef's uniform on his cake at least.


My husband is not bald (so far). I just completely forgot to make hair for him. I hope it is not a premonition of some sort...yikes!

So that is how it is with us. When he wants to tell me he loves me he says "here eat food" and when I want to tell him I love him, I say "here, eat cake" So if you come a-visiting and we feed you good food and cake, it is a happy day and all is well.


Monday 22 July 2013

Let Them Eat Cupcake.

As much as I hate baking cookies, I love baking cupcakes. I know serious cake bakers and cake connoisseurs think cupcakes are for novices and really not high brow enough, nevertheless they rock my world. I can't believe I just wrote "rock my world" so 80s.

I have my favourites when it comes to cupcake recipes. Since this post is not really about the recipe but what we will do with the cupcakes, I won't write them down for you, the one I use the most is the One Bowl Chocolate Cupcakes by Martha Stewart.

If like me you bake a lot of cupcakes, you might want to take a look at this nifty gadget I have just bought. It's a Cake Batter Dispenser. I know it is easy enough to just spoon in the batter into the cupcake cases but if like me you are a hoarder and compulsive buyer of gadgets, you'll buy this uni-tasker. 

So you've baked the cupcakes. I baked the Chiffon Cupcakes for this tutorial. While they are cooling make a batch of butter cream. I ALWAYS make Martha Stewart's Swiss Meringue Buttercream for all my cakes and cupcakes, but I hate making it because it takes too much time and energy. If you want to make some buttercream fast and don't care that it is too incredibly sweet here is the recipe for you. Whichever recipe you choose, colour it with food colour or let it be white and put it in the fridge to firm up a wee bit.

Now the fun part. Take your cooled cupcake and a sharp paring knife. Or if you are like me, you will buy the Cupcake Corer. Gently scoop out a small portion of the cupcake from the centre. Don't go all the way down. You just want a small cavity inside the cupcake. keep the gouged out bits aside.


Fill the hole with anything you like! Could be nuts or a glob of Nutella, m&ms or even a candy in it's wrapper! I filled my cupcakes with popping candy and jellybeans.


Now you simply plug the hole with the gouged out bits of cupcake. It is easier if you are neat with the gouging out business.


Just frost the cupcake with the buttercream you made. If you didn't make any just bring out the jar of Nutella and smoosh some over the top. 


I am one of those annoying people who always have some gum paste decorations ready to pop on to cupcakes and cakes. N helps me make them, keeps her gainfully occupied too. I foresee another blogpost in the future with instructions on how to make really easy ones to decorate your cupcakes with.

Here is a photograph of the cupcakes I made, all boxed and ready to go. At this point I should mention M. She is one of my closest friends and has a successful bakery of her own called Smitten (Her Red Velvet Cupcakes are heavenly). I always call M when I need supplies like cake boxes and cake boards, or just a couple of hundred grams of chocolate, because she buys them in bulk. M's driver and I are best friends. and stuff goes to and fro between our houses several times a week. If she needs my gum paste moulds, or I need her big rectangular pan, Sajjan is always happy to oblige. I can name Sajjan (the driver) because I doubt he has an online presence. If you aren't lucky to have a friend like M, just beg your local pastry shop for a box.


You can decorate the top of the box with a pretty doily, because the top of the box can't look plain if you are putting pretty things inside it.


But I understand how maybe you don't have time to find a doily and do all that to it, So if you like just download this label that I created on photoshop. Print and cut it out and stick it to your box and write your name on it.


There are endless flavour combinations possible. I made another batch for a halloween party last year. These were chocolate cupcakes filled with hazelnut praline paste and topped with vanilla butter cream and gum paste decorations. 


P.S. My husband has just read this blog and insisted that I clarify that I always get him to make my buttercream frosting. He does a pretty good job of it too.


Sunday 21 July 2013

Eat Cookie!

I have never been a big cookie baker. I know there are people who actually have cookie dough stashed in their freezers and bake cookies every other day, but I am not one of those people. I don't know what it is about cookies but I find that the taste is usually not worth all the effort. And if they are really good, they are eaten in a matter of minutes and are not as satisfying as biting into a big thick slice of chocolate cake.

However children seem to love cookies and not only do they want to eat them, but they want to bake them too. This gave me an idea for return gifts for N's sixth birthday party. This return gift tied in with the theme of her birthday party. She had a cupcake decorating and baking party. We made fondant decorations ahead of time, baked cupcakes and made buttercream in every colour of the rainbow. The children (even the boisterous ones) had a wonderful time decorating their cupcakes and then eating them. 

Anyway, back to the return gifts. I had seen several ideas online for home-made gifts in jars and in those days I was going through a phase of "DIY or Don't" so I decided to make 20 'Bake it Yourself' cookie mix jars for the guests to take home and bake.  After a lot of research I decided to use Bakerella's tutorial. She is one of my favourite bloggers and you can find her tutorial here. Of course mason jars are so very expensive here in India, as are pecans  and m&ms, so I adapted the recipe to make it cheaper. Each child got a jar of cookie mix. All they had to do at home was add an egg, one stick of butter and some milk, make the dough into balls and bake. I am dying to say Ta-da! but I won't.


A few days before you want to give away your jar of mix you can decorate the jar lid. Pearl pet jars have ugly white lids. So I used some patterned paper to cover each lid, making sure there was no glue on the inside of the lid. Here is a tutorial on how to cover jar lids with patterned paper. 

The beauty of the jar however lies in the view from the side. That photograph is coming up shortly but first here is what you need, to make one jar of "bake it yourself" cookie mix. keep the ingredients in separate bowls DO NOT MIX THEM TOGETHER.

165 g all purpose flour
1 tsp baking powder
1 tsp baking soda
90 g cooking oats (I used Quaker oats)
60g Gems or m&ms (Gems fade, especially the darker colours. m&ms don't)
125 g chocolate chips
100 g brown sugar
100 g white caster sugar
70 g salted peanuts ( I used Haldirams)
one empty, washed pearl pet jar that holds 1 litre or if you are fancy shmancy and only need to make one then a glass mason jar.

What you don't put in the jar and don't need if you are giving the cookie mix away:
1 egg
113 g melted amul butter
a couple of tbsp milk

Now we need to layer the ingredients. Put the ingredients into the jar in the following order and after each layer push down to really pack it in tight. you can use a washed meat mallet to do this. I found it easy to use a piece of paper folder into a funnel shape to get everything into the jar without being covered in flour.

layer 1: flour/baking powder/baking soda sifted together. 
Press down with mallet
layer 2: oats
press down
layer 3: gems
don't press down but make sure they are up against the sides of the jar so they can be seen from outside.
layer 4: chocolate chips
don't press down
layer 5: brown sugar
press down
layer 6: white caster sugar
press down
Peanuts (fill right to the top so that it sits flush with the top. )
The jar needs to be packed tightly so that the ingredients stay separate.

Now screw the lid shut, tie a ribbon around the neck and you are done! This is what the jar should look like from the side


I made labels and instruction tags on photoshop to decorate the jars with and I want to share those with you. You can make some yourself too but if you like you can just download mine. This is the first of the many printable freebies you'll find on my blog.

This is the label for the front of the jar. Print it on regular computer paper and cut along the red lines and around the chef's hat and stick to the jar with Fevicol. You can customise it with your name or your child's name as I did on the jar but I have left it blank for you.


You can attach an instructions tag to the jar neck with a piece of thread or ribbon and your child (or the child in you) can colour the lids in with pencil colours. Punch a hole on top.


I have created a template for you to just download and print on A4 sized card stock. 


and you can add this to the top of the lid if you like. Customise it with your own text


This has been by far the most appreciated return gift I have given in the last 6 years. The parents and kids spent a nice Sunday afternoon at home baking cookies without the fuss of measuring ingredients and they all sent me the most lovely photos too. All in all, a very fun activity that you ought to try at least once. Did I mention that the cookies are out of this world?


If you scrolled all the way down here, go see this funny scene from Mickey Blue Eyes to know the origin behind the title of this post Eat Cookie!


Saturday 20 July 2013

The Book That Wasn't

As I was saying earlier, I did try to make a book cake once before. It was for one of my best friends in the whole world. I am lucky to have two! A and I must have been twins in some past life (if I believed in that sort of thing) and P is my soul sister in this one. 

There are three things P loves among other things in life: A good book, A cup of tea and lazy chit chat sessions, and when she turned 40, I wanted to bake her a surprise cake around these three things so that it would be more meaningful to her.

My first idea was to make a book cake for her. "Gone with the Wind" is her favourite book so that seemed to be the obvious choice despite the ugliness of the cover. So painstakingly I painted a book cover for her. You can read here to know how I make book covers. I let it dry till it was ready to go on the cake and then I fought with my husband. I don't know what we fought about  but I remember it was one of those "kids driving us crazy" days and he made some comment about how I get time to do what I love and that he doesn't. Now in the interest of full disclosure, this is strange coming from him because he is one of the most supportive people in my life. Anyhow he must have had an especially bad day because that is what he said. And in retrospect, in what now seems to be a highly melodramatic move, I picked up the book cover and smashed it into smithereens onto the marble floor. But not before I took a picture!


Sorry P, you didn't get your book cake! and now I didn't have enough time to make one and let it dry so I considered my other options. I had seen some gum paste tea cups online but they looked awfully difficult to make, nevertheless I decided to give it a try. Since I hadn't told her I was bringing a cake, it wouldn't matter if I got her a handbag or something instead. 

So I followed an online tutorial to make the tea cup and saucer. I handpainted the teacup with food colours and gave the children strict instructions (glaring eyes and all) to stay far away from the teacup

I made some sugar pearls, some roses and some biscuits to go with the tea cup. Here is a photograph I took before I went off to attend her party

And what a party it was P! Never seen a more lively bunch of people in my life! Hey, don't expect a cake every year okay?


Friday 19 July 2013

An Ode To Magic

“Well, come back and have tea with us," said Moon-Face. "Silky's got some Pop Biscuits -and I've made some Google Buns. I don't often make them- and I tell you they're a treat!”
- Enid Blyton, The Enchanted Wood

There are two things of utmost importance in my life. Food and books and books about food and sometimes food that looks like books (this will make sense later). There is never any scrimping on either of these two in our house. It is probably a terrible thing to say but we are book and food snobs. Yes, even the kids. This makes everyday life very difficult because nobody wants to eat "Baingan Ka Bharta" and so to make the medicine go down we have to christen it "Aubergine Baba Ghanoush" and serve it in style to our six and two year old children. And after most meals we each settle down in a nook with a book, including my younger one who can spend hours pretending to read. 

The day N read her first book was cause for celebration at home. I was now desperate for her to start reading the Enid Blytons which were such an important part of my childhood, but somewhere at the back of my mind I wasn't certain if she would like it. In the times of Geronimo Stilton and The Wimpy Kid, I thought that maybe stories about Brownies and Goblins and five kids chasing mysteries on an island may be too quaint for her.

I had heard that Enid Blytons had been sanitised and made politically correct, so I re-read some of them to see if they still retained their original flavour. I read somewhere that some books had been modernised for 21st century kids and included references to cell phones and dating but thankfully, when I read The Faraway Tree series my absolutely favourite as a child, I found that despite some cosmetic changes like Fanny and Dick becoming Frannie and Rick (let’s face it this makes it easier to read, try saying Fanny and Dick loved playing together without choking) the ethos of the books remains the same. I did a quiet little jig when my daughter finished the first book and asked to read the second one. 

I had planned to make a Faraway Tree cake for her seventh birthday but unfortunately somewhere between her sixth and seventh, little miss N read all three books, moved on to Roald Dahl and outgrew the Faraway Tree cake stage altogether.

I all but jumped out of my seat when N’s best friend’s mother asked if I would make a Faraway Tree cake for her daughter! Her birthday is still a couple of weeks away but work has started on some of the more detailed and hand painted aspects of the cake. These take time to dry especially in the humidity of the Indian monsoon. This brings us back to food that looks like books. For some time now I have been fascinated with cakes that look like books. I even tried making one but that didn't quite work out as I had planned. This is my second chance at recreating a book as a cake. So here is stage one, the book cover. It is completely edible and the same size as the real book. 


My edible version and the real book cover. It is drying so some of the details still need to be added

First, I cut out a piece of Gum Paste (fondant mixed with tylose powder) the size of the book. Then it was left to dry for two days to ensure that there was no moisture left in it. The third day was when all the hard work happened. I used Americolor food colours, Wilton paintbrushes, a palette and a few drops of lemon juice to thin the colour and then I did my best to just copy the cover.

But what's a good Faraway Tree cake without all it's enchanted woodland creatures? Here is a work in progress photograph of hand moulded gum paste figures of Moonface, Silky, The Angry Pixie and Saucepan Man's head (albeit gruesomely staked on a toothpick). If you have to google these names to remind yourself of who they are...well shame on you!  


Silky still needs her wings and Saucepan Man needs his body

The piece de resistance will of course be the tree itself which is the topic of another blog post entirely. 

Meanwhile tonight for dinner I will be serving "Poulet Potato Roundels" aka "Aloo aur chicken ka paratha" and "Red Lentil and Basmati Rice Paella" aka "Khichdi".